
| You are in: Observing Tool (OT) > Science Program > Elements > OT Components and Iterators > OT AcqCam |
|
Acquisition Camera (AcqCam) in the Observing Tool |
Starting in semester 2002B, the Phase II definition of all AcqCam observation will be done using the Gemini Observing Tool.
This page explains how to configure the Acquisition Camera in the Observing Tool:
Refer to the AcqCam instrument pages and, in particular, the AcqCam observing strategies page for information on how best to use the instrument.
See the AcqCam OT tips & tricks and the AcqCam checklist for common questions (and mistakes) that the PI needs to consider.
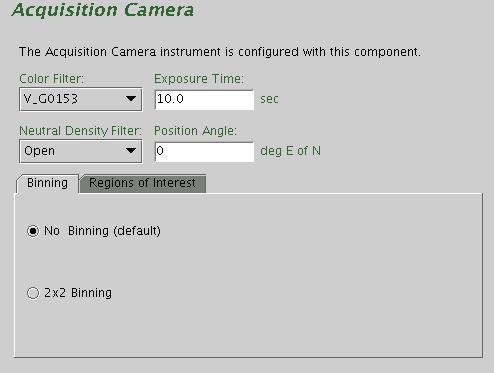
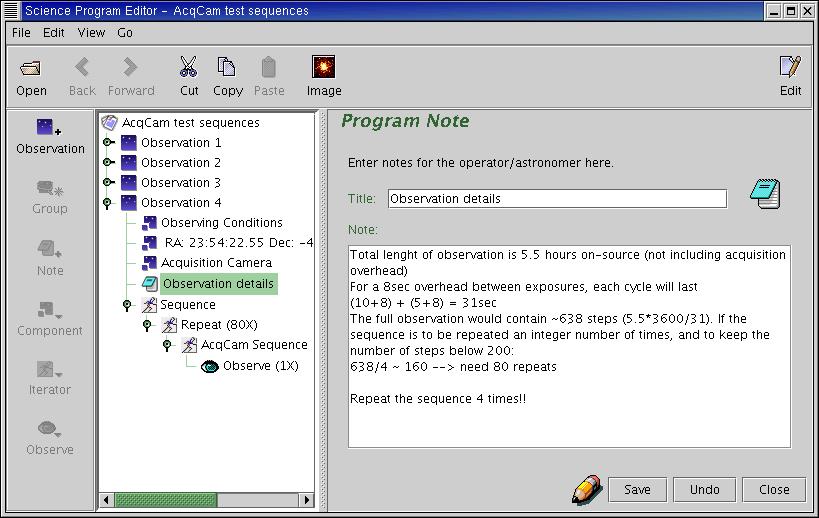
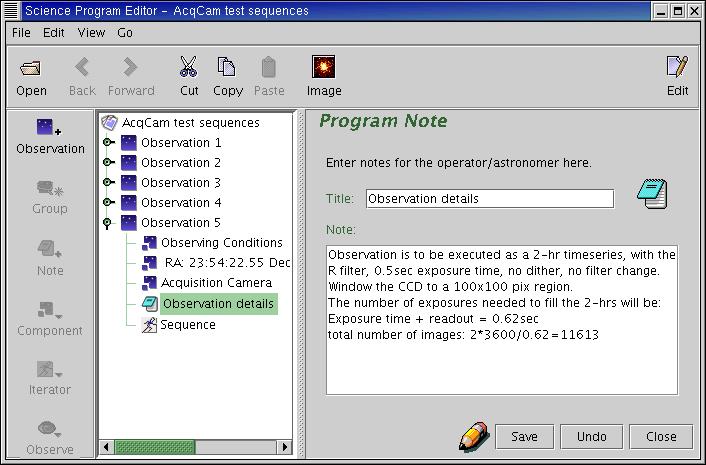
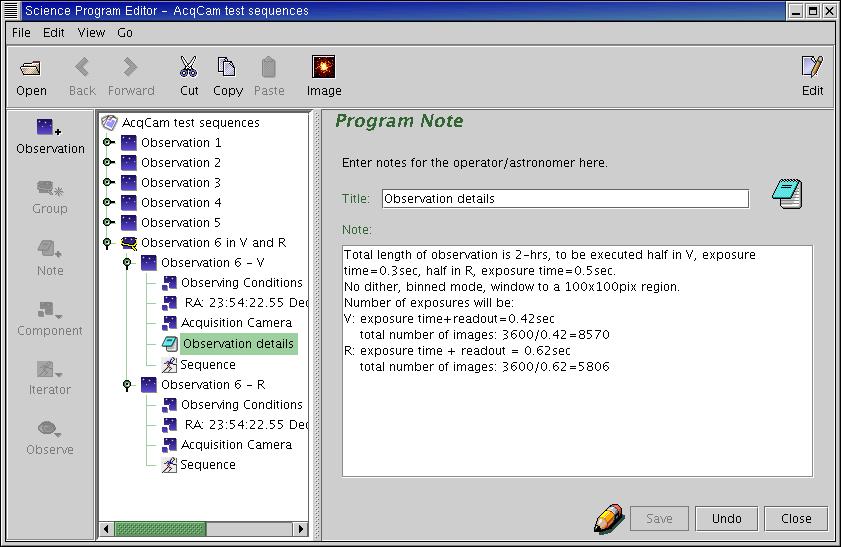
The detailed component editor for AcqCam is accessed in the usual manner, by selecting the AcqCam component in your science program, and sets the 'static' configuration of the instrument (such as filters, exposure time, binning and windowing) for each observation. Example screen shots are shown below:
|
|
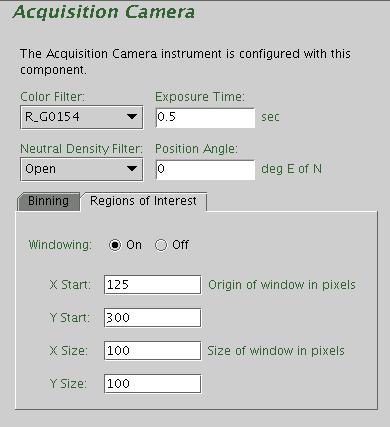
The colour and neutral density filters are chosen by clicking on the pull down lists (i.e. the down-pointing arrow) and selecting the desired filters. The filter names match those listed on the AcqCam filter pages.
The exposure time is set typing the number of seconds in the "Exposure Time" field.
The facility Cassegrain Rotator can rotate the instrument to any desired angle. The angle (in conventional astronomical notation of degrees east of north) is set by typing in the "position angle" window. The view of the science field in the position editor will reflect the selected angle. Alternatively the angle may be set or adjusted in the position editor itself by interactively rotating the science field.
Select the binning by clicking on the radio buttons. No binning (default), and
2x2 binning are supported.
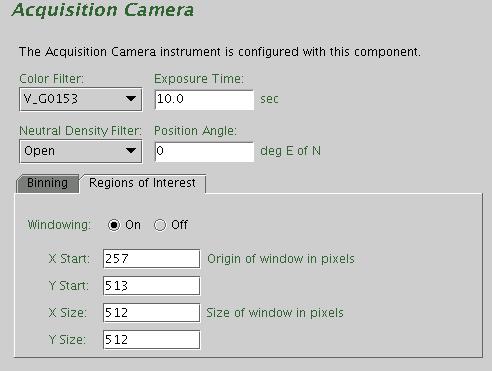
The detector can be configure to either read out the full frame or a smaller region of interest. The
default is to read out the full frame. To change this, click on the "Regions of Interest" tab,
select the "Windowing On" radio button and enter the (x,y) origin and
size (in unbinned pixels) of the preferred region.
The screen shots above show an example configuration for windowed readout with no binning. Although any region of interest can be defined, we recommend using the right side (513 < Y < 1024) of the CCD as it is more cosmetically clean. This is of particular relevance if the observation does not include dithering, as the central two columns of the CCD are dominated by hot pixels (from the "seam" between the two amplifiers).
The save button accepts the latest changes and stores the program to the local database, the undo/redo button (and, transiently, the edit pencil) toggles pending and saved changes and the close button closes the science program editor (saving any changes to the local database).
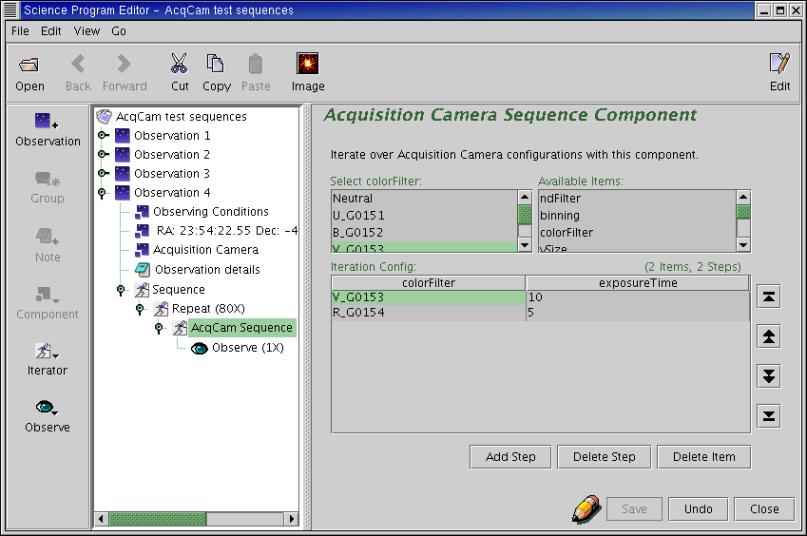
The AcqCam Iterator is a member of a class of instrument iterators. Each works exactly the same way, except that different options are presented depending upon the instrument. Below some of its features are shown in several examples. All examples assume full frame readout and no binning. Proposers should be aware that the Position Editor visual display currently does not reflect the size of the Science Area if windowing is enabled.
The iteration sequence is set up by building an Iteration Table. The table columns are items over which to iterate. The items that are available for inclusion in the iterator table are shown in the box in the upper right-hand corner of the AcqCam iterator. Selecting one of these items moves it into the table in its own column. Each cell of the table is selectable. The selected cell is highlighted green. When a cell is selected, the available options for its value are displayed in the box in the upper left-hand corner. For example, when a cell in the filter column is selected, the available filters are entered into the text box. When a cell in the exposure time column is picked, the upper left-hand corner displays a text box so that the number of seconds can be entered.
Rows or columns may be added and removed at will. Rows (iteration steps) may be rearranged using the arrow buttons.
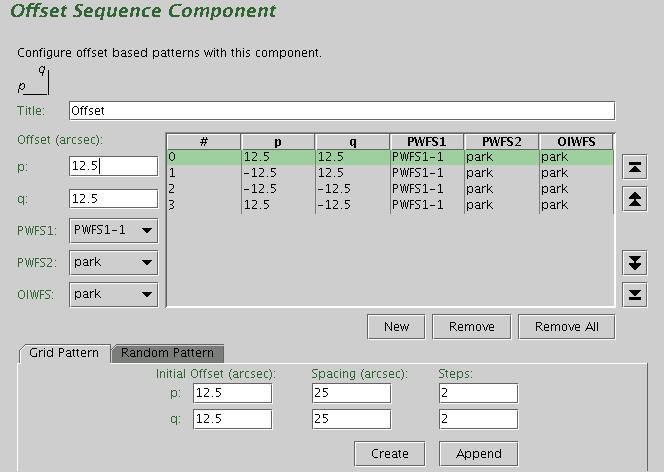
Example 1: extended object. The observation consists of a four position dither pattern, repeated three times for each filter, data taken in all four (BVRI) filters.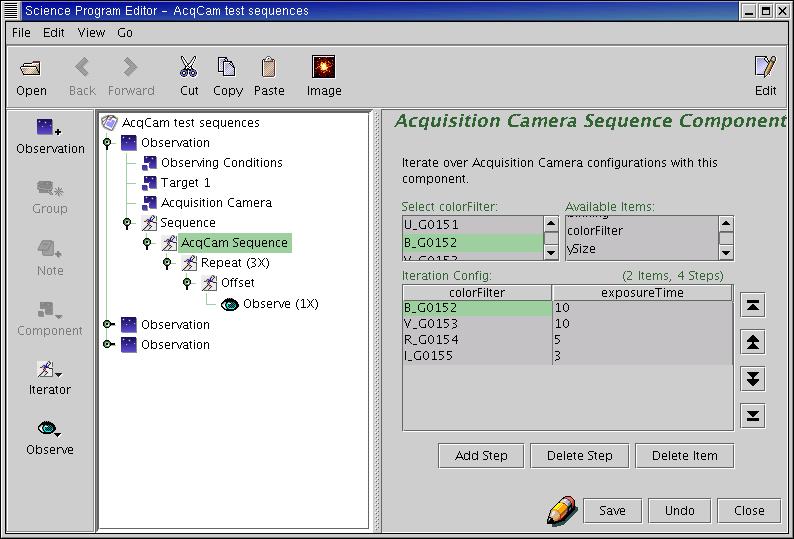
|

|
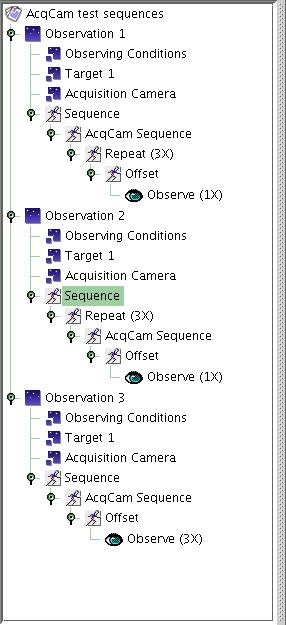
Observation 1 will result in a sequence where the dither pattern as defined above is repeated 3 times for each filters, following the order set in the AcqCam Sequence Component:
Filter B, 10 sec, [1 observe at each of 4 dither positions] * 3
Filter V, 10 sec, [1 observe at each of 4 dither positions] * 3
Filter R, 5 sec, [1 observe at each of 4 dither positions] * 3
Filter I, 3 sec, [1 observe at each of 4 dither positions] * 3
Observation 2 will result in a sequence where the dither pattern is executed once for each filter, then the whole set repeated two more times:
[ Filter B, 10 sec, 1 observe at each of 4 dither positions
Filter V, 10 sec, 1 observe at each of 4 dither positions
Filter R, 5 sec, 1 observe at each of 4 dither positions
Filter I, 3 sec, 1 observe at each of 4 dither positions ] * 3
And Observation 3 will result in the dither pattern being executed only once for each filter, but now with three exposures being taken at each dither position:
Filter B, 10 sec, 3 observes at each of 4 dither positions
Filter V, 10 sec, 3 observes at each of 4 dither positions
Filter R, 5 sec, 3 observes at each of 4 dither positions
Filter I, 3 sec, 3 observes at each of 4 dither positions
All observations will give the same time on source for each filter, but with Observation 3 being the most efficient one as it requires a smaller number of offsets.

|
|
![]()
![]()
Last update August 25, 2002; Cláudia Winge